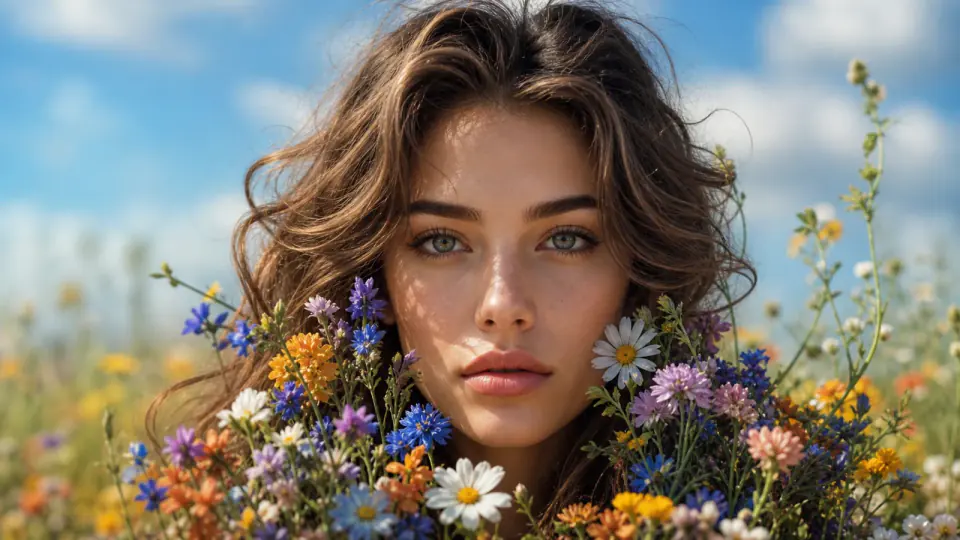
যে ছবি বদলাতে চান (সোর্স ফটো)
এমন একটি ছবি বেছে নিন যেখানে বদলানোর মুখটি স্পষ্ট দেখা যায়, ফ্রেমে যথেষ্ট বড় এবং হাত, চুল, সানগ্লাস বা মাস্কে ঢাকা নয়। মুখ ছাড়া বাকি সবকিছু একই থাকে, তাই পোশাক, শরীর, চুল ও পটভূমি আগেই আপনার পছন্দমতো হওয়া উচিত।
ছবিতে মুখ প্রতিস্থাপনের গাইড
অন্য ছবিতে একটি মুখ বসাতে দুটি ছবি লাগে: যে ছবিটি বদলাতে চান এবং যে মুখ যোগ করতে চান তার একটি পরিষ্কার ছবি। আগে কোণ, আলো ও রেজোলিউশন মিলিয়ে নিন, ফটো ওয়ার্কস্পেসে একটি টেস্ট চালান, তারপর যা দেখবেন তা একবারে একটি ভেরিয়েবল করে ঠিক করুন।
সরাসরি উত্তর
মুখ বসানো, ঢোকানো, প্রতিস্থাপন, পরিবর্তন বা অদলবদল যা-ই বলুন, ছবির কাজটি একই: একটি ছবি দৃশ্য দেয় এবং দ্বিতীয় একটি ছবি মুখ দেয়।
DeepSwapAI ফটো ওয়ার্কস্পেসে, যে ছবিটি বদলাতে চান সেটি সোর্স ফটোতে যায়, আর যে মুখ যোগ করতে চান তার ছবি টার্গেট ফেসে যায়।
এটি আধাআধি মিশ্রণ নয়। সোর্স ফটো শরীর, চুল, ভঙ্গি, পোশাক, আলো, ফ্রেমিং ও পটভূমি ধরে রাখে, আর টার্গেট ফেসের ছবি মুখের পরিচয়ের সংকেত দেয়। তাই জেনারেট করার আগে দুটি ছবির কোণ, আলো ও বিবরণ মিলতে হবে।
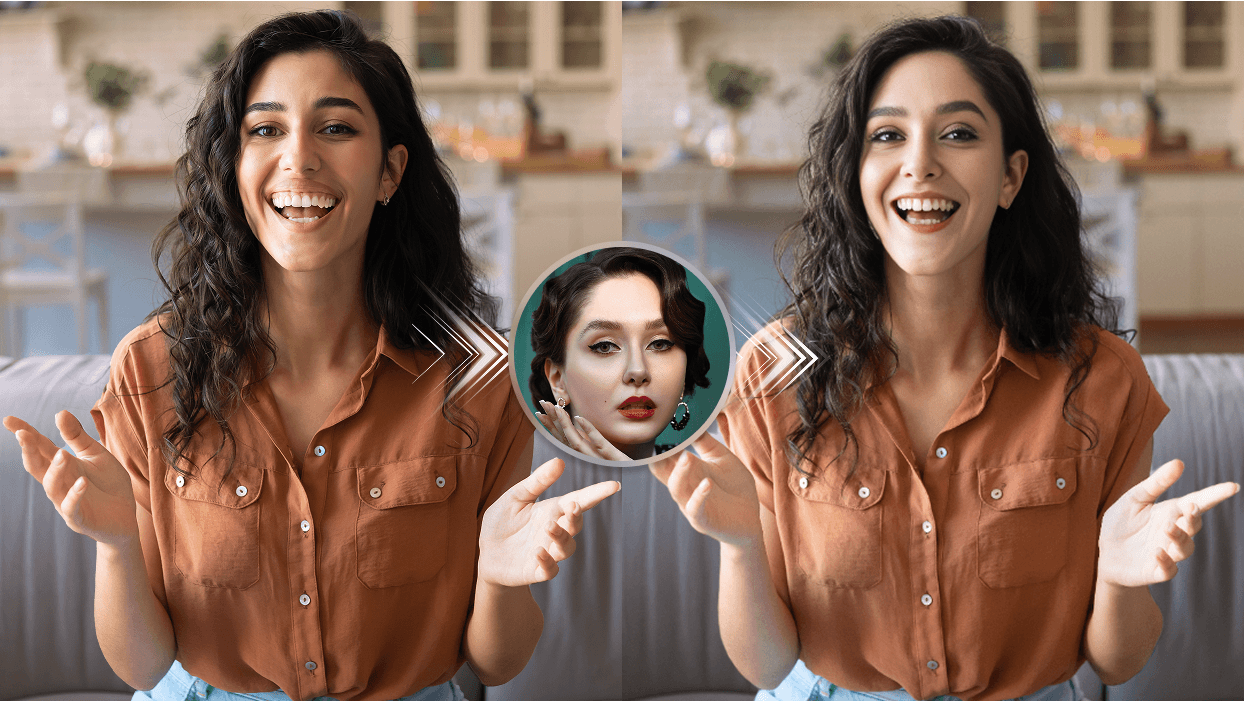
পাঁচ-ধাপের ফটো ওয়ার্কফ্লো
দুটি আপলোডকে বিনিময়যোগ্য হিসাবে বিবেচনা করবেন না। সোর্স ফটো হল দৃশ্য যা আপনি সম্পাদনা করতে চান। টার্গেট ফেস হল একটি পৃথক পোর্ট্রেট যার দৃশ্যমান মুখের ল্যান্ডমার্ক প্রতিস্থাপনকে নির্দেশিত করে।
দুটি ছবি বেছে নিন
বেশিরভাগ হতাশাজনক ফলাফলের শুরু ভুল জোড়া ছবি দিয়ে। প্রতিটি ছবি তার নিজের কাজের জন্য বেছে নিন, আর কোণগুলো মোটামুটি মিলছে কি না যাচাই করার পরেই ঠিক করুন কোন মুখ ব্যবহার করবেন।
এমন একটি ছবি বেছে নিন যেখানে বদলানোর মুখটি স্পষ্ট দেখা যায়, ফ্রেমে যথেষ্ট বড় এবং হাত, চুল, সানগ্লাস বা মাস্কে ঢাকা নয়। মুখ ছাড়া বাকি সবকিছু একই থাকে, তাই পোশাক, শরীর, চুল ও পটভূমি আগেই আপনার পছন্দমতো হওয়া উচিত।
সমান আলো এবং দুই চোখ দেখা যায় এমন একটি তীক্ষ্ণ পোর্ট্রেট বেছে নিন। ছবির মুখটির প্রায় একই দিক থেকে তোলা ছবি একেবারে আলাদা কোণের নিখুঁত স্টুডিও পোর্ট্রেটের চেয়ে ভালো কাজ করে।
ভারী ফিল্টার দেওয়া সেলফি, স্ক্রিনশটের স্ক্রিনশট, ভিড় থেকে কেটে নেওয়া ছোট মুখ এবং গভীর ছায়ায় থাকা মুখের ছবি এড়িয়ে চলুন। ছোট মুখ বড় করলে হারানো বিবরণ ফিরে আসে না।
কোণ, আলো ও রেজোলিউশন মিলিয়ে নিন
শুরু করুন পরিচয় দৃশ্যমানতা ও ভঙ্গি দিয়ে। একটি খুব ছোট, ঝাপসা, লুকানো, বা সম্পূর্ণ ভিন্ন দিকে থাকা মুখের জন্য সূক্ষ্ম টেক্সচার ক্ষতিপূরণ দিতে পারে না। বর্তমান ফটো ওয়ার্কস্পেস JPEG, PNG, এবং WebP চিত্র গ্রহণ করে যার আকার 30 MB পর্যন্ত।
| ভেরিয়েবল | পছন্দ করুন | এড়িয়ে চলুন | কেন এটি গুরুত্বপূর্ণ |
|---|---|---|---|
| পরিচয় রেফারেন্স | একটি তীক্ষ্ণ, ভালোভাবে আলোকিত, অবাধ মুখ | গ্রুপ শট, ভারী ফিল্টার, ছোট মুখ | পরিষ্কার ল্যান্ডমার্ক পরিচয় অস্পষ্টতা হ্রাস করে। |
| পোজ | টার্গেটের মতো একই ইয়াও এবং মাথার কাত | একটি চরম প্রোফাইলের জন্য সামনের দিকের রেফারেন্স | বড় কোণের দ্বন্দ্ব মুখের গঠন বিকৃত করতে পারে। |
| এক্সপ্রেশন | একটি নিরপেক্ষ বা টার্গেটের মতো অভিব্যক্তি | বন্ধ চোখ বা অতিরঞ্জিত অভিব্যক্তি, যদি না প্রয়োজন হয় | মুখ ও চোখের জ্যামিতি অনুভূত মিলকে প্রভাবিত করে। |
| আলো | দৃশ্যমান মুখের বিবরণ সহ হালকা আলো | চূর্ণ ছায়া, উড়ে যাওয়া হাইলাইট, রঙিন মুখের আলো | লক্ষ্য দৃশ্য এখনও আলো এবং ত্বকের ছায়া নির্ধারণ করে। |
| অক্লুশন | চোখ, নাক, মুখ ও চোয়াল বেশিরভাগই দৃশ্যমান | হাত, চুল, চশমার ঝলকানি, মাস্ক বা ল্যান্ডমার্ক ঢেকে রাখা বস্তু | লুকানো ল্যান্ডমার্ক কম নির্ভরযোগ্য পরিচয় সংকেত রেখে যায়। |
| রেজোলিউশন | সাধারণ আকারে পরীক্ষা করার জন্য পর্যাপ্ত পিক্সেল বিশিষ্ট একটি মুখ | বর্ধিত থাম্বনেইল বা কম্প্রেশন আর্টিফ্যাক্ট | বর্ধিতকরণ অনুপস্থিত পরিচয় বিবরণ পুনরায় তৈরি করে না। |
ফটো ওয়ার্কস্পেস ব্যবহার করুন
সাধারণ ব্যর্থতা ও সমাধান
কম ফিল্টার সহ একটি কাছের, তীক্ষ্ণ রেফারেন্স ব্যবহার করুন। নিশ্চিত করুন যে মুখটি চোখ, নাক, মুখ ও চোয়ালের বিবরণ দেখানোর জন্য যথেষ্ট ইমেজ জুড়ে রয়েছে।
রেফারেন্স এবং টার্গেটের মধ্যে কোণের পার্থক্য কমিয়ে দিন। চরম প্রোফাইল এবং খাড়া মাথার কাত প্রায় মিলে যাওয়া পোজের চেয়ে কঠিন।
আরও সমান মুখের আলো সহ একটি টার্গেট বা শক্তিশালী রঙিন আলো ছাড়া একটি রেফারেন্স বেছে নিন। আলোর উৎস হিসেবে টার্গেট দৃশ্যটি সংরক্ষণ করুন।
চুল এবং আনুষাঙ্গিক টার্গেট দৃশ্যের অন্তর্গত। একটি টার্গেট নির্বাচন করুন যেখানে তারা গুরুত্বপূর্ণ ল্যান্ডমার্ক লুকায় না এবং স্বাভাবিক দেখার আকারে প্রান্তের রূপান্তর পরীক্ষা করুন।
সামঞ্জস্যপূর্ণ মুখ ও চোখের অবস্থা সহ একটি রেফারেন্স ব্যবহার করুন। যদি টার্গেট অভিব্যক্তি চরম হয়, অন্যান্য পরিবর্তনশীল পরিবর্তন করার আগে একটি কাছের অভিব্যক্তি পরীক্ষা করুন।
প্রথমে ফাইলের ধরন ও আকার যাচাই করুন, তারপর নিশ্চিত করুন যে মুখটি বড় এবং কোনো কিছুতে ঢাকা নয়। আপলোড ত্রুটি, আটকে থাকা টাস্ক এবং ব্যর্থ ফলাফলের জন্য সমস্যা সমাধান গাইড অনুসরণ করুন।
এতে সরান ভিডিও গাইড অথবা GIF গাইড এবং মোশন ব্লার, টার্ন, অক্লুশন, আলোর পরিবর্তন এবং লুপ সিমগুলি ফ্রেম বাই ফ্রেম পরীক্ষা করুন।
আপলোড, সারি ও ফলাফলের সমস্যার জন্য ধাপে ধাপে যাচাই: ফেস সোয়াপ সমস্যা সমাধান গাইড.
এর বদলে ব্যাচ বা গ্রুপ
স্ট্যান্ডার্ড ব্যবহার করুন ফটো ফেস সোয়াপ ওয়ার্কস্পেস। দৃশ্যটি সোর্স ফটোতে এবং পরিচয় প্রতিকৃতিটি টার্গেট ফেসে রাখুন।
ব্যবহার করুন একাধিক ফেস সোয়াপ। এটি গ্রুপ ইমেজে ব্যক্তিদের সনাক্ত করে এবং প্রতিটি নির্বাচিত মুখকে একটি পৃথক রেফারেন্সে ম্যাপ করে।
ব্যবহার করুন ব্যাচ ফেস সোয়াপ এবং ব্যাচ বনাম একাধিক-মুখের সিদ্ধান্ত নির্দেশিকা পর্যালোচনা করুন একটি সেট আপলোড করার আগে।
সম্মতি ও দায়িত্বশীল ব্যবহার
আপলোড বা শেয়ার করার আগে এগুলো পড়ুন: প্রাইভেসি এবং কনসেন্ট চেকলিস্ট, পরিষেবার শর্তাদি.
পর্যালোচনা চেকলিস্ট
একটি ছবির জন্য, ফটো ফেস সোয়াপ ওয়ার্কস্পেসখুলুন। একটি সেটের জন্য, ব্যবহারের আগে একটি প্রতিনিধি লক্ষ্য পরীক্ষা করুন ব্যাচ ওয়ার্কফ্লো.
ছবিতে মুখ নিয়ে প্রশ্ন
যে ছবিটি বদলাতে চান সেটি সোর্স ফটো হিসেবে এবং আপনার মুখের একটি পরিষ্কার, সমান আলোর ছবি টার্গেট ফেস হিসেবে আপলোড করুন, যেখানে মাথার কোণ ছবির মানুষটির কাছাকাছি। ৬ ক্রেডিট খরচ নিশ্চিত করুন, জেনারেট করুন এবং শেয়ার করার আগে চোখ, মুখ, চোয়াল ও কিনারা যাচাই করুন।
সোর্স ফটো হল মূল দৃশ্যের ছবি যা আপনি সম্পাদনা করতে চান। এর শরীর, চুল, পোজ, পোশাক, আলো, ফ্রেমিং এবং ব্যাকগ্রাউন্ড ফলাফলের জন্য ভিজ্যুয়াল প্রসঙ্গ সরবরাহ করে।
টার্গেট ফেস হল পৃথক পরিচয়-রেফারেন্স পোর্ট্রেট। একটি পরিষ্কার, অবাধ মুখ ব্যবহার করুন যার কোণ এবং অভিব্যক্তি সোর্স ফটোর ব্যক্তির সাথে যুক্তিসঙ্গতভাবে কাছাকাছি।
হ্যাঁ। ফটো ওয়ার্কফ্লো শুধু মুখটি বদলায়, তাই শরীর, চুল, পোশাক ও পটভূমি সবই সোর্স ফটো থেকে থাকে। এমন ছবি বেছে নিন যার মাথার কোণ, ত্বকের আলো ও ফ্রেমিং মুখের ছবির সঙ্গে মানানসই, কারণ মাথার আকৃতি ও চুল স্থানান্তরিত হয় না।
একটি গ্রুপ ফটোর জন্য মাল্টিপল ফেস সোয়াপ ব্যবহার করুন। এটি একটি ছবিতে থাকা ব্যক্তিদের সনাক্ত করে এবং আপনাকে প্রতিটি নির্বাচিত মুখের জন্য একটি পৃথক পরিচয় রেফারেন্স ম্যাপ করতে দেয়। স্ট্যান্ডার্ড ফটো ওয়ার্কফ্লো একটি দৃশ্যের ছবি এবং একটি পরিচয় রেফারেন্সের জন্য।
বর্তমান ফটো ওয়ার্কফ্লো প্রতি উৎপন্ন ফলাফলের জন্য ৬ ক্রেডিট খরচ করে। লাইভ ওয়ার্কস্পেস জমা দেওয়ার আগে চূড়ান্ত ক্রেডিট পরিমাণ দেখায়।
হ্যাঁ। শুধু এমন মুখ ব্যবহার করুন যা ব্যবহারের অনুমতি আপনার আছে এবং এমন ছবি যা সম্পাদনার অনুমতি আছে, আর এমন ফলাফল শেয়ার করবেন না যা কেউ কী বলেছে বা করেছে সে বিষয়ে মানুষকে বিভ্রান্ত করতে পারে। প্রাইভেসি ও কনসেন্ট চেকলিস্টে আগে কী নিশ্চিত করতে হবে তা আছে।
পর্যালোচনা রেকর্ড করুন
বিনামূল্যে ফেস সোয়াপ কোয়ালিটি স্কোরকার্ড উপরে দৃশ্যমান চেকগুলিকে ফটো, ভিডিও এবং GIF-এর জন্য সাতটি নথিভুক্ত মানদণ্ডে রূপান্তর করে। এটি স্থানীয়ভাবে গণনা করে, JSON বা CSV রপ্তানি করে এবং সম্মতি, পরিচয় ম্যাপিং এবং প্রকাশকে গুরুত্বপূর্ণ গেট হিসেবে রাখে যা একটি সংখ্যাসূচক স্কোর অগ্রাহ্য করতে পারে না।
এই গাইডটি কীভাবে তৈরি করা হয়েছে
DeepSwapAI প্রোডাক্ট টিম বর্তমান সোর্স ফটো ও টার্গেট ফেস লেবেল, আপলোডের ক্রম, গ্রহণযোগ্য ফরম্যাট, ৬ ক্রেডিট খরচ, ট্রায়াল ছবি রপ্তানির নিয়ম এবং দৃশ্যমান মানের ভেরিয়েবলগুলো পর্যালোচনা করেছে, তারপর সেই তথ্যগুলোকে ব্যাচ, গ্রুপ ছবি, ভিডিও, GIF এবং আউটপুট স্কোরকার্ড ওয়ার্কফ্লোর সঙ্গে যুক্ত করেছে। এই গাইড আউটপুটের মান পরিমাপ করে না এবং কোনো একটি ইনপুট নির্দিষ্ট ফলাফল দেবে এমন প্রতিশ্রুতিও দেয় না। লিঙ্ক করা স্কোরকার্ডটি একটি স্বচ্ছ মানব-পর্যালোচনা রুব্রিক, কোনো বায়োমেট্রিক মেট্রিক বা প্রদানকারী লিডারবোর্ড নয়। পণ্যের তথ্য এবং সীমা ৫ অক্টোবর, ২০২৬-এ পর্যালোচনা করা হয়েছে; দেখুন যাচাইকরণ পদ্ধতি.
পরবর্তী ওয়ার্কফ্লো যাচাই
যে ছবি বদলাবেন সেটি সোর্স ফটোতে এবং মানানসই একটি মুখের ছবি টার্গেট ফেসে রাখুন, ৬ ক্রেডিট খরচ ও সম্পূর্ণ ইমেলসহ ট্রায়াল ওয়াটারমার্ক নিশ্চিত করুন, তারপর বড় পরিসরে যাওয়ার আগে ফলাফল যাচাই করুন।